

Central Line vs Peripheral Line Training: How to Choose the Right Simulation Setup
This article explains the key differences between central and peripheral line training and outlines how to choose the right simulation setup for each, ensuring students learn safe, accurate vascular access techniques.
What you’ll learn:
- How central and peripheral lines differ in purpose, placement, and risk level
- Essential equipment for central line simulation, including ultrasound and high-fidelity manikins
- Step-by-step guidance for setting up realistic central line training scenarios
- How peripheral line training works using IV arms and smaller catheters
- Practical tips for arranging supplies, positioning manikins, and supporting beginner learners
All nursing and medical schools require students to receive training in central and peripheral line placement. The training involves lessons in inserting vascular lines into a patient’s veins to deliver needed medication. Students must know the differences between central and peripheral lines, including how, where, and when they are inserted.
What is a Central Line?
A central line is a long catheter inserted into a large vein near the heart. The three primary areas for accessing the large vein include the groin, neck, and chest. Most doctors and nurses insert a central line through the neck or chest, unless the neck or chest is injured or otherwise inaccessible.
Most patients need central line treatment when they require intensive, long-term care with IV fluids, medications, or blood. There is a higher risk of infection associated with central line placement, so students must undergo appropriate simulated training to learn safe, effective central line techniques.
What is a Peripheral Line?
A peripheral line is a short catheter inserted into a small vein on the arm, hand, or foot. Medical professionals insert peripheral lines to deliver short-term treatments, such as antibiotics, fluids, and certain medications. The peripheral line is usually kept inserted for only a couple of days.
Although there is less risk of an infection with a peripheral line, a patient could still develop vein inflammation if the line is not inserted or removed correctly. Students must continuously practice inserting and removing peripheral lines to ensure they fully understand the process.
How to Choose the Right Simulation Setup
Central and peripheral lines require different procedures, techniques, and catheters. That is why you cannot use the same simulation setup to teach both. Below, we will explore the best ways to choose the right simulation setup for central lines and peripheral lines.
Central Line Training Setup
Central line training requires the use of a central venous catheter (CVC), ultrasound equipment, and sterile medical tools and supplies. Since the procedure requires deep vein access, the students must use an ultrasound to monitor the catheter insertion to ensure it is safely placed in the vein. A simulated central line dressing tray will come with the basic supplies you will need:
-
Tray
-
Mask
-
CSR Wrap
-
Gauze
-
Plastic Tape
-
Alcohol Swaps
-
Vinyl Gloves
-
Tegaderm
The test subject should be a high-fidelity manikin rather than a simulated human patient. High-fidelity manikins with simulated vascular systems provide a realistic training experience for students.
Beginner students will feel less stress and anxiety if they can practice on an artificial patient that cannot be injured. Some simulation manikins, such as the central venous catheterization simulator, are designed specifically for practicing central line insertions and treatment delivery.
Here are the general steps involved in setting up a central line simulation training scenario for your students:
1) Arrange the Tools and Supplies
Lay out the basic tools and supplies needed for the central line insertion. Arrange the sterile equipment on a sterile procedure table (e.g., catheter central line kit, sterile saline syringes, scalpel, suture kit), and the non-sterile support equipment (e.g., tape, ultrasound gel, gauze pads, bandages) on another table.
If your central line dressing tray kit is missing certain medical supplies, you can invest in a medical simulated dressing tray. It contains additional gauzes, towels, and metal forceps you may need to assist with the training.
2) Position the Manikin
Position the high-fidelity manikins on the beds as if they were a human patient. A central line insertion would require a patient to be in the supine position, lying on their back with their face pointing upward.

3) Set Up the Ultrasound Machine
Place the ultrasound machine next to the bed and the simulated manikin. Turn on the machine and, if available, select the “vascular” preset.
4) Inspect the Central Line
Practice inserting the IV tube into the central line catheter stub. Check to ensure the clamp securely closes on the stub. That is what you will check when you observe your students configuring the central line themselves.
Peripheral Line Training Setup
Peripheral line training is not as sophisticated or dangerous as central line training. It is more of a repetitive skill that requires students to repeatedly practice inserting, securing, flushing, and replacing the tubing. However, it still requires many of the same supplies as central line training, such as gloves, gauze pads, syringes, and tape. Just keep in mind that a smaller IV catheter is used.
A high-fidelity manikin is not required for peripheral line training. You may supply a simple IV injection training arm to your students. It is basically a realistic manikin of an adult human arm with replaceable veins and skin. Some training arms even come with simulated blood, fluid supply bags, and carrying cases. The blood certainly helps add to the realism of the training experience.
Here are the general steps involved in setting up a peripheral line simulation training scenario for your students:
1) Set up the IV Training Arm
Lay out the IV training arm on a clean bed or table. Fill the arm with the simulated blood supply if it supports it. The blood will kick back once the students insert the needle into the vein.
2) Arrange the Supplies
Arrange all the medical tools and supplies on a separate table. Be sure to include several small IV catheters, preferably in the 20G to 24G range, to accommodate different lesson plans.
An ultrasound machine is not necessary for peripheral line training unless you want to help your beginner students better understand the patient’s inner vascular system.

3) Hang Up a Visual Guide
There are many steps involved in the peripheral line insertion process, starting from sanitizing the hands to securing and dressing the line. Create a visual guide showcasing the different steps, then hang it on the wall as a poster or infographic.
Beginner students will feel more confident if they can refer to the visual guide for assistance until they remember the steps on their own.
Get Your Medical Supplies for Central Line and Peripheral Line Training
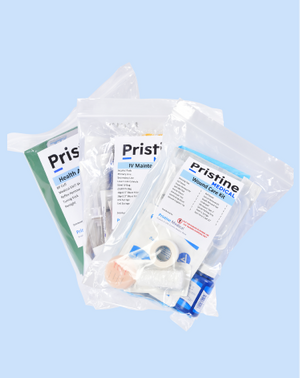
Pristine Medical is the preferred provider of medical supplies for delivering realistic simulated central line and peripheral line training to students. You can find individual medical supplies, preconfigured kits, and custom kit options based on your central line and peripheral line training plans.
Frequently asked questions about central and peripheral line simulation training
1. What is the main difference between central line and peripheral line training in simulation?
Central line training focuses on inserting a long catheter into a large vein near the heart (usually via the neck, chest or groin) for intensive, long-term treatments and carries a higher infection risk. Peripheral line training focuses on short catheters placed in small veins in the arm, hand or foot for short-term treatments and is more about repetitive practice in inserting, securing, flushing and replacing smaller IV lines.
2. Why can’t I use the same simulation setup for both central and peripheral lines?
3. What does a realistic central line training setup include?
4. What does a basic peripheral line training setup look like?
Peripheral line training often uses a simple IV injection training arm instead of a full manikin. The arm is placed on a clean bed or table and may be filled with simulated blood so students can see blood “kick back” when they access the vein. Nearby, you arrange the supplies, including several small IV catheters in sizes like 20G to 24G, plus other basic items used repeatedly during insertion, securing and dressing of the line.
5. Is an ultrasound machine required for peripheral line training?
An ultrasound machine is not required for peripheral line training. It can be added optionally if you want beginner students to better understand the inner vascular system, but the core peripheral line practice can be done effectively using an IV training arm, small IV catheters and a clear visual step-by-step guide.