

IV Dressing Changes and Site Maintenance: A Step-by-Step Skills Lab Teaching Guide
IV dressing changes and site maintenance are essential nursing skills that protect patients from infection and catheter complications. Teaching these procedures in a simulated skills laboratory gives students a safe, realistic environment to master proper technique, site assessment, and infection prevention before working with real patients.
Key points:
- Why IV dressing changes and site maintenance are critical for preventing bloodstream infections and catheter dislodgement
- How CDC guidelines recommend changing IV dressings every 5 to 7 days, or sooner if they become loose or damp
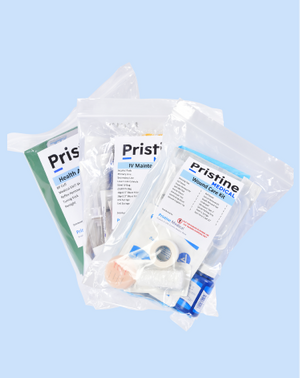
- The essential medical supplies needed in a simulated skills laboratory, including sterile gloves, gauze, dressings, and IV insertion kits
- Why preparation steps such as reviewing patient charts, hand hygiene, and proper positioning are vital before any IV procedure
- How to teach students to perform a thorough IV site assessment by checking for redness, swelling, leakage, tenderness, or discoloration
- The correct technique for removing old dressings safely without dislodging the catheter or causing patient discomfort
- Why proper cleansing with chlorhexidine and alcohol is necessary to disinfect the IV insertion site before applying a new dressing
- How to apply a new dressing securely while keeping the catheter stable and the patient comfortable
Intravenous (IV) therapy is one of the most common clinical procedures performed in hospitals and healthcare settings. Nurses and medical practitioners insert IV catheters to deliver medications, blood, fluids, or nutrients into a patient’s bloodstream.
However, IV catheters require dressing changes and other forms of site maintenance to prevent infection or catheter dislodgement. Remember that an IV insertion site is a direct connection to a patient’s bloodstream. The dressing is what blocks outside invaders from getting inside. The last thing you would want to happen is for some foreign substance, such as bacteria, to get into their bloodstream by bypassing the dressing.
Nursing and medical students must understand these concepts and learn to perform IV dressing changes and site maintenance in a clinical setting to protect their future patients.
The Steps for Teaching in a Simulated Skills Laboratory
According to the guidelines of the Centers for Disease Control and Prevention, IV dressings should be changed routinely every 5 to 7 days or if they are visibly loose or damp. A simulated laboratory is the best place to replicate a realistic clinical setting for the purpose of teaching about IV dressing changes and site maintenance.
Here are the steps involved in teaching these skills to your students in a simulated skills laboratory:
1) Acquire the Necessary Supplies
The first step is to stock your simulated laboratory with all the necessary medical supplies for teaching about IV dressing and site maintenance care. In addition to the standardized IV insertion kit, your laboratory may also need the following supplies:
- Sterile gloves
- Sterile gauze
- Dressing
- Surgical tape
- Winged catheter
- Alcohol pads
- Saline flush solution
- Waste disposal container
- Face mask
- Simulated medication
Your students should not practice on real human patients during their early training. They are better off practicing on high-fidelity manikins or task trainer arms instead. These objects offer realistic anatomical simulations to help students practice IV dressing changes and site maintenance without risking any injury to a real human patient.
2) Make the Necessary Preparations
Preparation is the key to providing safe IV care to a patient. Students should practice reviewing the patient’s chart to learn more about their situation, such as identifying the patient and learning about their known allergies, dressing change schedules, and other previous complications, if any.
Next, have your students perform the necessary hand hygiene by sanitizing their hands with an alcohol-based hand sanitizer or washing their hands with soap and water. From there, students should position the patient into a comfortable position where they can easily access the IV insertion site.
Tell your students to wear clean, sterile gloves on their hands. They are necessary to wear to protect nurses and their patients from the potential risk of infection.
3) IV Site Assessment
Students are now ready to conduct a thorough assessment of the IV site on the patient. The assessment involves looking for visible abnormalities on the site, such as redness, swelling, leakage, drainage, tenderness, discoloration, or warmth.
Beginner students may struggle with noticing slight swelling or color changes on the site. The best way to confirm these signs is to have those students compare the affected limb with the opposite limb to notice the differences in appearance.
It is also important to ask the patient whether they feel pain or discomfort. If a student notices any sign of infection or infiltration at the IV site, they should report it to their instructor right away.
4) Removing the Old Dressing
Now comes one of the most critical site maintenance tasks: removing the old dressing. Students should take extra caution during this step to avoid accidentally dislodging the catheter.
Teach your students how to stabilize the catheter hub with one hand while using the other to lift the dressing edges in a horizontal direction gently. Don’t have your students peel the dressing straight up. Instead, it is better to stretch the dressing to gently release the adhesive part of it. That will help minimize pain or discomfort to the patient’s skin.
Once a student has removed the dressing, have them reassess the IV insertion site to see if there are signs of complications. If everything on the site looks good, they can proceed to the next step of cleansing the site. But if the site shows signs of problems, they should seek assistance from a doctor or medical professional.
5) Cleansing the IV Insertion Site
Dispose of all the contaminated or used materials you used previously, such as your gloves, into the waste container.
The next step is to clean the IV insertion site. Chlorhexidine with alcohol is commonly used for this task because it provides advanced protection against bacteria and microbes. Students should swab the solution back and forth on the site for at least 30 seconds to thoroughly disinfect it.
No gentle swabbing in this scenario. Apply a firm wiping motion with your swab to clean around the insert site. Avoid directly touching the site after cleaning to prevent contamination. When you finish swabbing the site, allow time for the site to completely dry to ensure the effectiveness of the antiseptic solution.
6) Apply the New Dressing
At this point, you can finally apply the new dressing on the IV insertion site. Make sure the dressing fully covers the insertion site and that the catheter is secured properly. Avoid excessive tension on the skin because you want to keep it comfortable for the patient.
Acquire Your High-Quality IV Supplies Today
Do you need high-quality medical supplies to accurately simulate your IV dressing change and site maintenance lesson plan? Pristine Medical is one of the most recommended suppliers of simulation medical products online. You can find all the items you need to conduct accurate and realistic lessons on IV dressing changes and site maintenance in your simulated clinical setting.
Frequently Asked Questions About IV Dressing Changes and Site Maintenance
1. Why are IV dressing changes important in nursing care?
IV dressing changes protect the insertion site from bacteria and other contaminants that could enter the bloodstream. Proper dressing maintenance also helps prevent catheter dislodgement and reduces the risk of serious infections in patients.
2. How often should IV dressings be changed?
3. What supplies are needed to teach IV dressing changes in a simulation lab?
4. What should students look for during an IV site assessment?
Students should check the site for redness, swelling, leakage, drainage, tenderness, discoloration, or warmth. They should also ask the patient about pain or discomfort and report any signs of infection or infiltration to their instructor immediately.
5. What is the safest way to remove an old IV dressing?
Students should stabilize the catheter hub with one hand and gently lift the dressing edges horizontally, stretching the adhesive to release it from the skin. This technique minimizes patient discomfort and reduces the risk of accidentally dislodging the catheter.
6. What solution is used to clean the IV insertion site?
Chlorhexidine with alcohol is commonly used because it provides strong protection against bacteria and microbes. Students should swab the site with a firm back-and-forth motion for at least 30 seconds and allow it to dry completely before applying a new dressing.