

Pressure Injury Staging: Teaching Wound Assessment in Simulation
Pressure injury staging is a visual and clinical assessment skill that nursing students can practice with realistic wound models and structured patient scenarios. Effective simulation should teach learners to describe skin integrity, tissue depth, visible structures, wound characteristics, and patient risk factors before assigning a stage. Students also need to recognize when an injury cannot be staged from what is visible and when the findings call for additional assessment or escalation.
Key Points
- Teach students to examine skin condition and tissue characteristics before assigning a pressure injury stage.
- Include intact skin, partial-thickness loss, full-thickness loss, and obscured wound beds in simulation scenarios.
- Emphasize that visible tissue structures, not wound size alone, inform staging.
- Discuss how pressure-related discoloration can appear differently across skin tones.
- Include unstageable and deep tissue pressure injury examples in addition to Stages 1 through 4.
- Differentiate pressure injuries from other skin and wound conditions during case review.
- Use wound measurement tools and structured notes to practice consistent documentation.
- Assess students on recognition, reasoning, appropriate escalation, and clear communication.
Pressure injuries, such as bedsores, are very common in clinical settings when patients suffer mobility issues and remain in the same position for prolonged periods. When a patient’s body weight continuously presses against the surface of a bed or wheelchair due to their inability to move, it puts pressure on the blood vessels, muscle tissue, and skin underneath. This pressure restricts the flow of oxygen, blood, and nutrients to these areas, resulting in damage and impairment.
Teaching the Stages of Pressure Injuries
Not all pressure injuries are the same. There are different stages of pressure injuries based on the depth of the tissue and skin damage. It is important for medical and nursing students to understand the different stages of pressure injuries by recognizing the symptoms of the damage. Once they can do that, your students can learn to apply the most appropriate treatment option.
When setting up your simulation laboratory for pressure injury staging, you should have different simulated stations devoted to each pressure injury stage. The station could have a manikin or simulated patient showing the visible damage or symptoms of their particular pressure injury. Students can be given the task of identifying the type of pressure injury and the best course of action for treating it.
Below are the primary stages of pressure injuries:
Stage 1
Stage 1 pressure injuries are the least serious, as they typically only show red or discolored skin that remains intact. It won’t turn pale or white if you apply pressure to it, but it can feel firm, soft, or warm. Please emphasize that skin redness alone is not enough to diagnose the condition as a stage 1 pressure injury.
The best thing for students to do is learn to assess the localized skin color and tissue consistency. They should also practice communicating with the patient by asking them if they feel pain or discomfort. The more information obtained, the more accurate the diagnosis.
Stage 2
Stage 2 pressure injuries show at least a partial loss or some brokenness in the outer skin layers, otherwise known as the dermis and epidermis layers. The loss will appear as a shallow open sore, such as a blister containing clear fluid or a wound bed with a red or pink color.
Some beginner students will struggle with this diagnosis because they will look at a partial loss of skin as a complete loss of skin. It is important for students to tell the difference between a partial and full loss of the external skin layers.
Stage 3
Stage 3 pressure injuries are the ones that involve a complete loss of the thickness of the external skin layers. A patient suffering from a stage 3 pressure injury will likely have deeper tissue layers showing, such as their adipose tissue, subcutaneous tissue, or granulation tissue.
Stage 3 doesn’t involve the visibility of actual muscle, tendon, bone, or cartilage. Students should learn to properly diagnose stage 3 by recognizing the correct tissue showing in the wound bed. If they see muscle, tendon, bone, or cartilage, it is not a stage 3 injury. What usually shows is the fatty tissue that exists deep under the skin.
Stage 4
Stage 4 pressure injuries are quite serious because they involve the loss of both skin and tissue, resulting in the visibility of muscle, tendon, bone, or cartilage in the wound bed. It is easy to assume that this is the worst stage because of this reveal.
Beginner students shouldn’t automatically assume that this is a Stage 4 pressure injury since some pressure injuries can get worse than this. If slough (dead skin) doesn’t completely cover the wound bed, it is likely Stage 4.
Unstageable
Unstageable pressure injuries are those where you have skin and tissue loss, as well as slough completely covering the wound bed. However, these are still considered “unstageable” pressure injuries because it is impossible to determine the true extent of the tissue loss if you cannot see the wound.
Creating Realistic Simulated Wound Assessment Scenarios
Pressure injury staging requires a comprehensive wound assessment rather than a brief visual observation. Your simulated laboratory must train students to properly perform this assessment to better recognize the stage of a pressure injury.
Here is what you should have your students doing in a realistic simulated wound assessment:
- Confirm the patient’s identity
- Review the patient’s medical history
- Communicate details about the assessment with the patient
- Assess the patient’s level of pain and discomfort
- Assess the wound’s anatomical location
- Confirm the wound is a pressure injury and not something else, such as an arterial ulcer or venous ulcer.
- Measure the length, width, and depth of the pressure injury using the appropriate instruments, such as a cotton-tipped applicator.
- Inspect for undermining or tunneling under the skin edges
- Identify the visible tissue types showing in the wound bed, such as granulation tissue, epithelial tissue, or slough
- Check to see if there is wound drainage fluid
- Check for an odor from the wound bed (if any)
- Assess the wound edges to see if they are still attached
- Look for signs of an infection (e.g., redness, swelling, localized pain)
- Document all findings
- Recommend a new or updated treatment plan
Set up your simulation laboratory to take your students on a journey through all these different tasks. It will require you to establish a simulated patient using a manikin, trainer arm, or some other realistic object to represent the patient in the scenario.
Obtain Medical Supplies
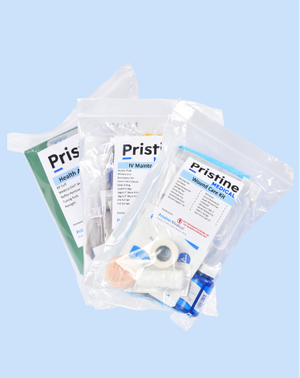
Do you need to obtain high-quality medical supplies for your pressure injury wound assessment simulations? Pristine Medical is one of the most trusted suppliers of medical supplies in the world. The Pristine Medical Wound Care Kit is the ideal choice for all nursing and medical schools with wound assessment simulations.
Frequently Asked Questions About Pressure Injury Staging in Simulation
1. How can students distinguish Stage 1 pressure injuries from ordinary skin redness?
A Stage 1 pressure injury involves intact skin with a localized area of non-blanchable erythema or an equivalent change in appearance. Learners should also assess location, temperature, firmness, discomfort, and pressure exposure, especially because visible color changes differ across skin tones.
2. What is the key teaching distinction between Stage 2 and Stage 3 pressure injuries?
3. When should a simulated pressure injury be classified as unstageable?
4. Why should pressure injury training include deep tissue pressure injury?
5. How can instructors teach pressure injury assessment across different skin tones?
6. Which wound measurements should students record during simulation?
7. How can students distinguish a pressure injury from moisture-associated skin damage?
8. Should a healing Stage 4 pressure injury be reclassified as Stage 3 or Stage 2?
9. How should instructors evaluate pressure injury staging competency?