

Safe Injection Technique Training: Step-by-Step for Nursing Students
This article provides a comprehensive, step-by-step guide to safe injection technique training for nursing students, explaining injection types, essential preparation steps, skill-building practices, and safety measures needed to ensure accurate, sanitary, and patient-safe injections.
What you’ll learn:
- The differences between intramuscular, subcutaneous, and intradermal injections
- How to properly gather equipment, simulated medications, and supplies
- How to assess the patient and choose the correct injection site
- Preparation steps that ensure sanitation and prevent complications
- How to draw medication correctly and avoid air bubbles
- Step-by-step instructions for performing each type of injection
- How to monitor patient reactions during training
One of the key responsibilities of any registered nurse is ensuring patient safety. Since nurses frequently administer injections to treat patients, they must know the proper technique to perform injections safely. That is why nursing students need to undergo safe injection technique training.
Classroom lessons can teach theoretical knowledge of safe injection techniques. However, a nursing student will never become proficient in this skill unless they undergo practical, step-by-step training to ensure they can deliver safe injections to patients every single time. Otherwise, the patient is at risk of getting an infection or inadequate treatment for their current condition.
Understanding the Different Types of Injections
Not every injection is the same. Nursing students need to know the differences among the three primary types of injections before beginning their safe injection technique training. Here is a basic rundown of the three injection types:
Intramuscular Injection
An intramuscular injection is an injection into the patient’s muscle. Nurses often administer vaccines and certain fast-acting medications via intramuscular injection because it can deliver medication to a patient’s bloodstream faster than intradermal or subcutaneous injections. The most common sites for intramuscular injections are the upper arm, thigh muscles, or buttocks.
Subcutaneous Injection
A subcutaneous injection is an injection into the layer of tissue underneath the skin. Nurses typically use this injection method to administer slower-acting drugs, such as insulin, that require a steady release into the bloodstream. Subcutaneous injections still work faster than intradermal injections, but slower than intramuscular injections. Typical sites for subcutaneous injections include the thigh, upper arm, and abdomen.
Intradermal Injection
An intradermal injection is administered below the skin’s surface, above the underlying skin layers. It has the slowest absorption rate of all the other injection types. Nurses usually administer intradermal injections when they need to perform diagnostic tests and screenings on a patient, such as tuberculosis screenings and allergy tests. The common intradermal injection site is the inner forearm.

Below are the general steps involved in safe injection technique training for nursing students:
1) Gather all Equipment and Accessories
The first step is to gather all necessary equipment and accessories needed to perform the injection safely. It will give your nursing students immediate access to the realistic injection supplies they need. These items generally include:
-
Syringe
-
Needle
-
Alcohol Swab
-
Sterile Water Vial
-
Distilled Water Ampule
-
Medical Injection Pad
The easiest way to obtain these items is to use an injection training kit. It comes with the standard injection supplies that nurses would typically have available in a clinical setting. Some injection training kits are designed to support specific injection types, such as intramuscular and subcutaneous.
2) Gather the Simulated Medications
Do you want your nursing students to practice administering injections of specific medications? In addition to gathering the equipment and accessories, you should also collect the simulated medications your nursing students will need for their injection training.
You can either buy the simulated ampules and vials individually or purchase a simulation medical pack with an assortment of various simulated medications. They may include the following:
-
Simulated Insulin
-
Simulated Digoxin
-
Simulated Antibiotics
-
Simulated Morphine
-
Simulated Epinephrine
-
And many others!
Since they are “simulated” medications, they don’t contain any actual medicine. What they do provide is realistic labels and packaging to help train nursing students on how to accurately read medication labels and dosage amounts when performing critical injections on the job.
3) Assess the Patient
What is the right medication to use, and where should the injections be made? Nursing students must answer these questions by conducting an initial patient assessment to confirm the patient’s current condition and any known allergies. Once students confirm this information, they will know which medication to administer and which injection type to use.
Choosing the best injection site is a critical part of this process. Nursing students need an easily accessible and visible site to help ensure a successful injection. The chosen site will correlate to the condition being treated.
4) Prepare for the Injection
Now is the step where nursing students can make initial preparations before administering the injection. These preparations include:
-
Comfortably positioning the patient on the seat or medical table
-
Washing and sanitizing their hands
-
Putting on medical gloves
-
Laying out the necessary medical equipment and supplies

Students should never neglect the preparatory steps involved in the injection process. Instructors must ensure an efficient, flawless injection process by making preparation mandatory. Staying sanitary and keeping all supplies readily available will help prevent unnecessary delays or problems.
5) Draw Up the Medication
Have the nursing students draw up the medication into the syringe from the simulated vial or ampule. They should follow the recommended dosage amounts listed on the simulated medications’ labeling. The more they practice reading the labeling, the better they will get at following critical medication administration instructions.
When inserting the needle into the vial or ampule, the needle tip should remain below the fluid level to prevent air bubbles from getting into the syringe. If using a simulated vial, flip it upside down before drawing medication from it.
6) Perform the Injection
By this point, the nursing students should already know which type of injection they will make and the site where they will make it. Have the students clean the planned injection site in a circular motion using the alcohol swabs. They can now inject the patients.
Here is a general rundown of how to perform each type of injection:
-
Intramuscular – Use the non-dominant hand to hold the muscle around the site with the index finger and thumb. Insert the needle into the muscle at a 90-degree angle with the other hand. Administer the medication into the muscle by pushing the top of the syringe with the dominant thumb. Pull the needle straight out of the muscle.
-
Subcutaneous – Instruct each nursing student to use their non-dominant hand to pinch the fatty tissue on the patient’s abdomen or the back of their arm. They should pinch about a two-inch fat fold using their index finger and thumb. Using the dominant hand, insert the needle at about a 45 to 90-degree angle into the skin fold. Inject the medication and then withdraw the needle from the skin.
-
Intradermal – Use the non-dominant hand to spread and pull the skin at the injection site gently. Use the dominant hand to slowly insert the needle at a 5 to 15-degree angle into the flat skin surface of the site. The needle should be inserted until the whole bevel is hidden beneath the skin’s surface, usually around 3 mm deep.
Students should observe the patient throughout the injection process to ensure there are no adverse reactions. Simulated human patients are trained to respond to the student’s actions realistically to help the student learn. If a student makes a mistake, the simulated human patient will react appropriately.
On the other hand, if the students are working with a manikin, the instructor should watch closely for any mistakes, since the manikin may not be sophisticated enough to simulate a reaction.
7) Safe Disposal of Needles
Nurses should not recap their dirty needles because this increases the risk of needlestick injuries. Fortunately, most modern syringes have retracting mechanisms or flip shields to secure the needles without putting your fingers near them. Instruct your nursing students to use the safety mechanism on their syringes.
Finally, students should dispose of used needles and syringes in the designated sharps container. Every hospital or clinical setting will have a sharps container, a special, leak-proof container designed for safely disposing of medical needles and syringes.
Additional Tips
Beginner nursing students usually feel nervous and shaky during their first time practicing their injection techniques. It is perfectly natural for anyone to be anxious the first time they perform injections.
The best thing to do is to tell your students to anchor their hand when injecting with a syringe and needle. They can anchor their hand by firmly resting it on their patient for greater stability. That will take some of the tension off the dominant hand, leaving it free to safely and precisely inject the site.
Remind students to wait for the alcohol to evaporate on the patient’s skin after applying the alcohol swab. It will ensure that all bacteria are eliminated from the surface, reducing the risk of infection.
Gather Your Injection Supplies Today
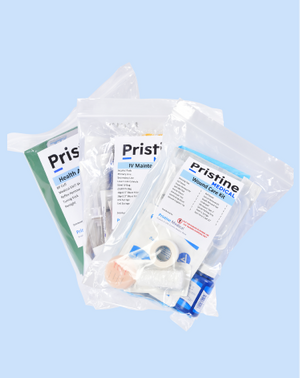
Do you need an injection training kit or other related medical supplies to help teach your nursing students about safe injection techniques? If so, you will need a reliable supplier that understands the training needs of nursing students like yours.
Pristine Medical is the premier supplier of injection medical supplies for nursing schools. You can find simulated medications, syringes, needles, injection pads, and many other relevant training materials to thoroughly train your nursing students in performing injections safely.
Frequently asked questions about safe injection technique training for nursing students
1. Why is safe injection technique training so important for nursing students?
Safe injection technique training is essential because nurses frequently administer injections and are directly responsible for patient safety. Without proper, step-by-step practice, students risk causing infections, delivering inadequate treatment or choosing the wrong injection type or site. Practical training ensures they can perform injections safely and consistently, not just understand the theory.
2. What are the main types of injections that nursing students need to learn?
3. What equipment and simulated medications are used in safe injection technique training?
4. How is the actual injection performed for intramuscular, subcutaneous and intradermal routes?
The article outlines specific steps for each injection type: Intramuscular: clean the site, hold the muscle with the non-dominant hand, insert the needle at 90° into the muscle, inject, then pull the needle straight out. Subcutaneous: pinch a two-inch fat fold with the non-dominant hand, insert the needle at about 45–90° into the fold, inject, then withdraw the needle. Intradermal: gently pull the skin flat, insert the needle at 5–15° until the bevel is just under the skin (around 3 mm), then inject slowly.
5. What are the key safety steps for handling and disposing of needles after training injections?
Students are taught not to recap dirty needles because it increases needlestick risk. Instead, they use the needle’s built-in safety mechanism, such as a retracting system or flip shield, to secure the needle without putting fingers near it. All used needles and syringes must then be placed directly into a designated sharps container, which is leak-proof and designed specifically for safe disposal.